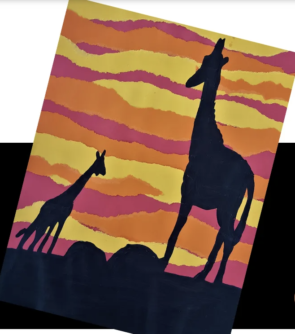
Week of May 25, 2020
Safari Animal Shadow Drawing
Watch and listen!
What you will need:
- Three pieces of colored paper, one red, one orange and one yellow for sunset- sunset colors could be any combination like a blue, yellow and purple.
- glue
- your any animal toys
- pencil and eraser
- Black paint
- small brush
Let’s make a sunset background with colored papers!
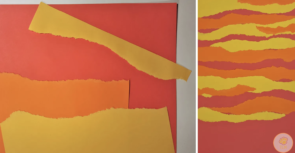
- Take three pieces of colored paper, one red, one orange and one yellow.
- Tear strips paper from the yellow and orange paper.
- Glue them onto the red – alternate the colors but you can do whatever your sunset looks like, more yellow at the top or tearing larger or smaller strips.
- YOU’RE DONE FOR THE SUSET BACKGROUND!
Place your safari animals out!
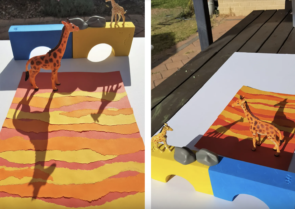
- Place your safari animal against the late afternoon sunset. Just imagine the large ears of an elephant or the antlers of an antelope against this sunset.
- Play with different heights and angles – take the angle of the sun into consideration because it distorts the shadows of your animals.
- Take a pen or pencil and trace the shadow outlines when everything is arranged the way you want it to be.
- Paint the shapes in with black paint.
- Ta-da! You are all done!
source:taminglittlemonsters.com
Week of May 18, 2020
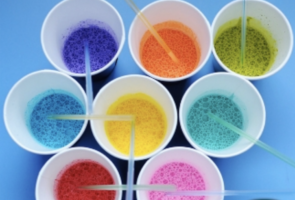
Bubble Paints!

This week we’ll be making bubble art!
Listen carefully to the story below.
Watch and Listen!
What you”ll need:
- Small plastic containers to hold the paint mixture
- Tempera paint in a variety of colors or food colorings
- 1T liquid dish soap
- 4T water
- 2T sugar
- Straws/Bubble wands
- Paper (construction, card stock, watercolor paper)
Let’s get started!
Mix the dish soap, water and sugar together, and stir until the sugar dissolves.
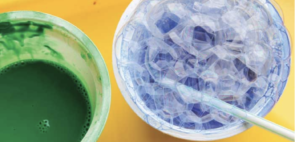
Make sure the bubbles are large enough, like in the picture!
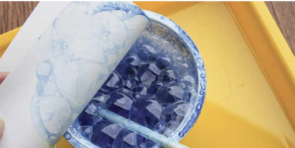
Now, carefully place your paper over the bubbles. The bubbles will paint the paper for you with fun shapes!
Or, you can blow the bubbles into the air using bubble wands (if you have them), and let them stick onto the paper!

Tada! Your bubble masterpiece is finished!
After you’re done, try making other cool color combinations!
source:www.earlylearningidea.com
Week of May 11, 2020
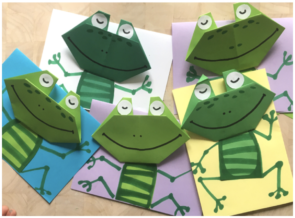
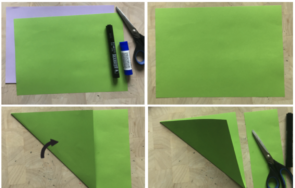
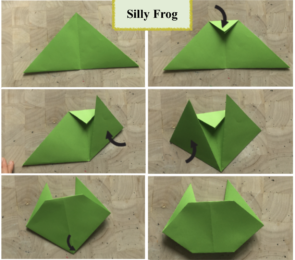
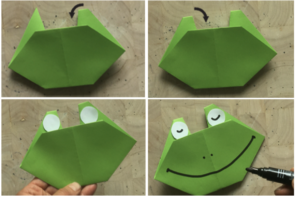
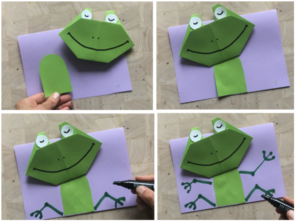
Let’s make a silly frog!
Watch and Listen!
What you’ll need:
- Colored paper – origami paper/ construction paper
- Markers
- Scissors and Glue
Make and Play
source: www.krokotak.com
Week of May 4, 2020
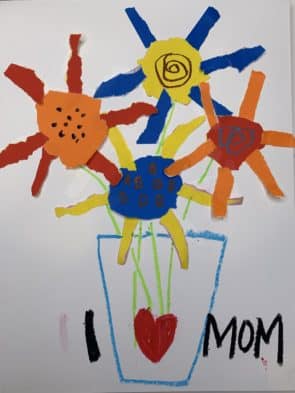
Happy Mother’s Day!

Hands with Flowers – Pablo Picasso
Let’s make mommy’s favorite flowers for Mother’s Day!
What you will need:
- White paper
- Construction paper
- Glue stick
- Markers / Oil pastels
Let’s begin!
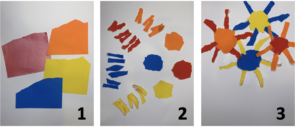
- Tear out a square or rectangular shape from construction paper
- Make 4 sets of flowers – 4 circular shapes for the flower center and at least 6 petals for each flower
- Place 4 circular shapes above the middle of the paper and glue them in. Then glue the 6 petals around each of the circular shapes.

4. Draw a straight line from the flower to right above the bottom of the paper. This will be the stem. Use oil pastel or markers.
5. Draw a rectangular shape below the middle of the paper for a vase
6. Add some details on the center of the flowers! You can draw circles, or dots, or spirals. You can write a message to mom too!
Week of April 27th
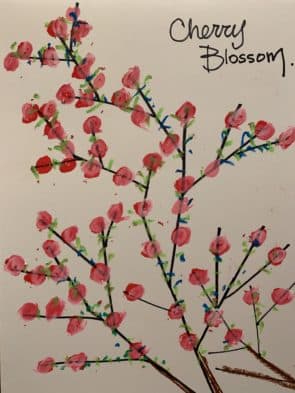
Let’s make some beautiful cherry blossoms!
Watch and Listen
What you need:
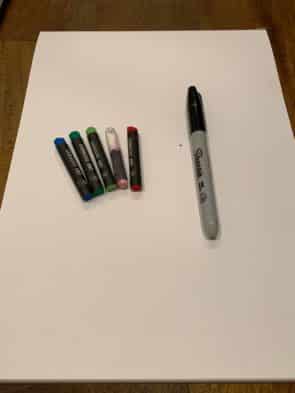
- White drawing paper
- Oil pastels (red, white, green and blue)
- Black sharpie
Draw and Color!
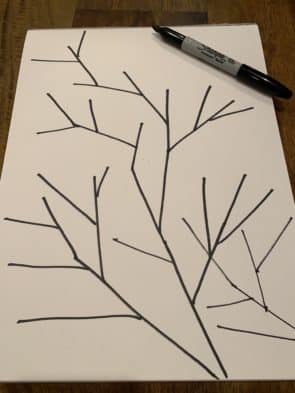
Start one long line straight from the bottom to the top of the paper.
Ms. Kay recommends 3 big branches from the bottom!
Then, add smaller branches going out of the big branches.
Next, start adding small red spots on the branches. The spots can be on the branch, or touch the branch.
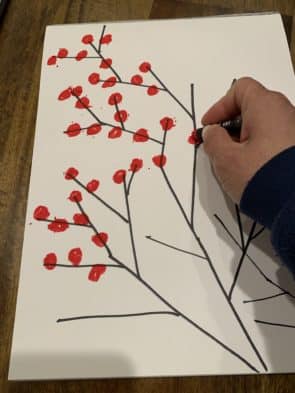
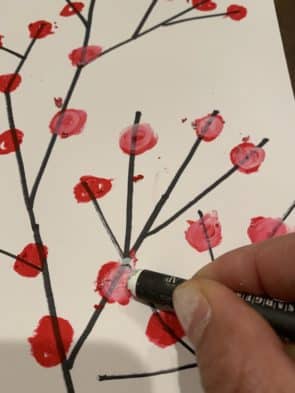
Now, use the white oil pastel to add spots on top of the red spots, to make the color pink!
Let’s add some cute leaves to the tree. Use the green oil pastel to add tiny, tiny leaves on the branches. Be creative! You can make the branches, flowers and leaves different colors!
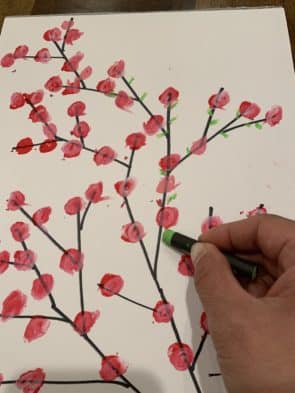
Tada! I can’t wait to see all of your beautiful flower trees!
Week of April 20th
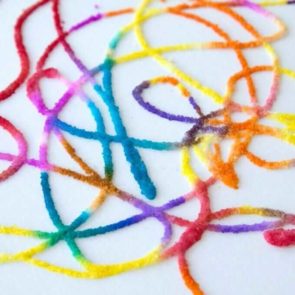
This week, our young artists will make an abstract painting with salt and glue. It is very simple and fun with only 3 ingredients. Students will learn a simple technique and love watching the colors travel across their painting.
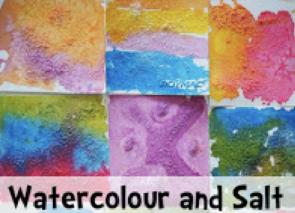
What you need:
- Watercolor paper / any thick board
- School Glue
- Watercolors
- Table salt
Draw, Cover, and Paint
——->
- Draw very simple designs with glue on the paper/board. Lots of dots, dancing lines and a few shapes.
- Cover the lines of glue with salt, shaking off the excess.
- Gently touch a wet paintbrush to the salt and watch the colors travel across the painting (You can use a pipette instead of a paint brush).
 . .
. .
Week of March 30th
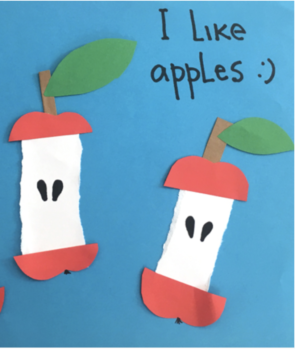
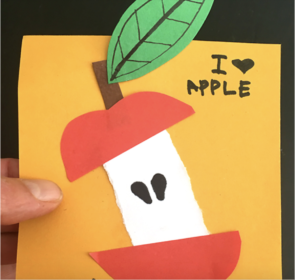
I LOVE APPLES!
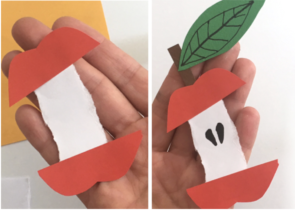
Let’s make an apple card! Our young artists will practice their motor skills to make shapes out of scrap papers by coordinating their hands.
What you need:
- any white paper (for core of apple)
- red, yellow, and green paper (for top and bottom of apple, a leaf, and background)
- a scissors and a glue
- a black pen (for apple seeds)
Rip and cut!
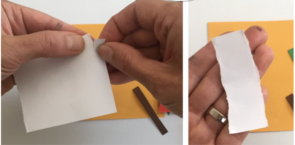

Glue them together
add details to the leaves and the apple seeds!
source:http://krokotak.com/2020/03/spring-sheep-craft-for-kids/
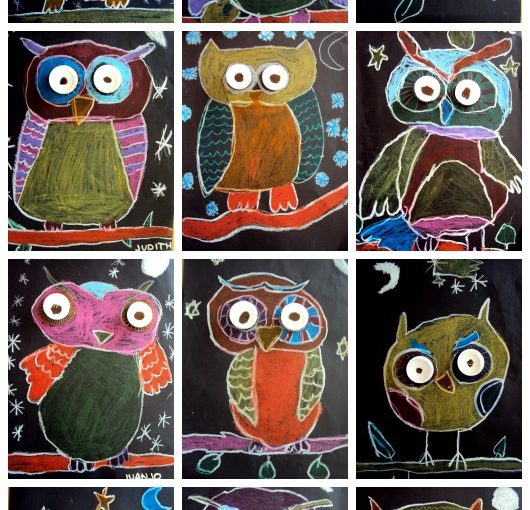
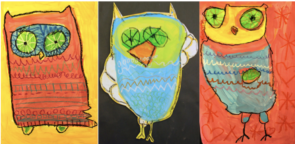
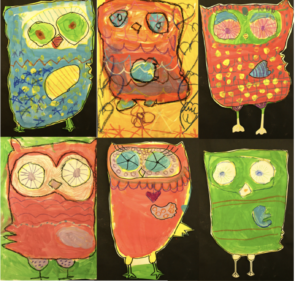
Week of March 23rd
K-1
Let’s make a simply cute owl! Students only need line, shape, and color with full of sparkly imagination.
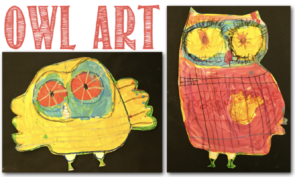
watch and listen!
Owl Babies by Martin Waddell
Drawing
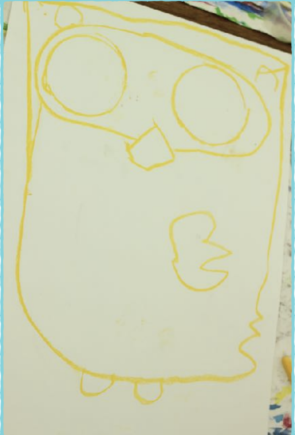 Using a small condiment cup, trace two circles near the top of the paper for the eyes.
- For the nose, draw a rhombus between the two eyes.
- Draw a “mask” around the eyes. Show them how to draw a line close to, but not touching, the eyes and nose.
- Place oil pastel above mask and draw a straight horizontal line. Add ears. Next, draw a long letter “U”. This is the body. The tall owl shows a few back tail feathers.
- Draw a wing in the middle– like a pocket.
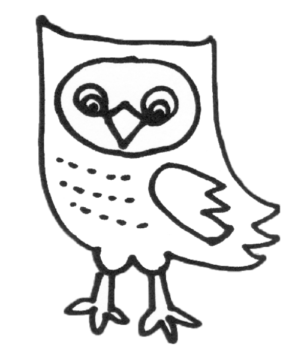
The open winged owl has big wings.
- Draw wing shapes on both sides of the owl body.
- Add two small bumps for the legs.
Painting
- paint the body first using one of the four colors.
- Select a different color for the wings.
- Paint the remaining owl shapes with the rest of the colors or color combo.
- Cut out the owl and glue to black paper
Outlining and Adding Patterns
- Use black oil pastels to trace lines.
- Encourage students to use the pastels(oil pastels or crayons) to trace over drawing lines and add patterns to make the colors pop.
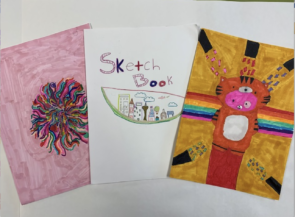
Week 1 & 2
Let’s make artful sketchbook to get you going!
When it comes to limited supplies, drawing is going to be the best way to have our students find success. They can simply draw with the materials they have, any type of mark-making and paper will do the trick.
1.Watch video
Our young artists can watch this video and get inspired to make their own sketchbook. They are encouraged to decorate their sketchbook cover and with your help- You draw simple lines on their sketchbook- so kids can finish up with the lines you draw. let them tell you about their line story!
Harold and the Purple Crayon by Crockett Johnson
2. Make the sketchbook To make this sketchbook you only need white papers(at least 5 of them) and a stapler.
click this: Make artful sketchbooks
3. Decorate your sketchbook cover!
Examples:
4. Finish the Picture! Let your kids’ imaginations soar with these exciting “Finish the Picture” prompts. Click the link below, you can either print or draw 5 prompts for them in their sketchbooks. Let your kids get creative with their own story!