Week of May 25, 2020
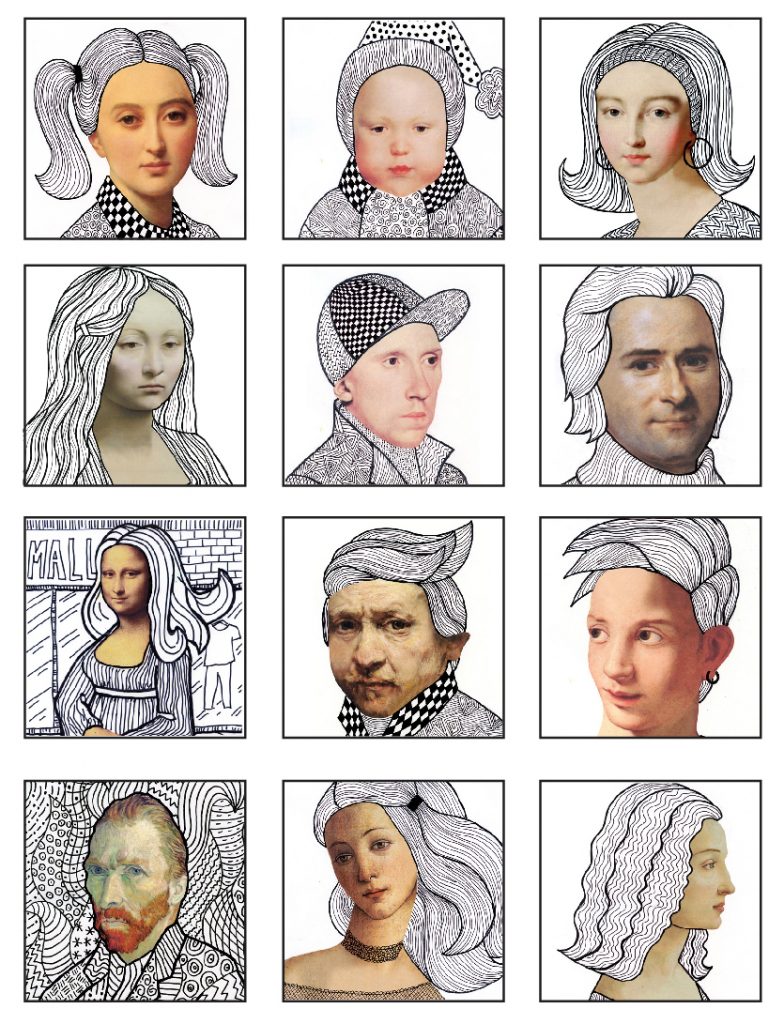
Line – Portrait Collage
What You will need:
- Portrait from old magazine or picture of yourself
- Drawing paper
- Permanent black marker
- Scissors and glue
let’s make line portrait!
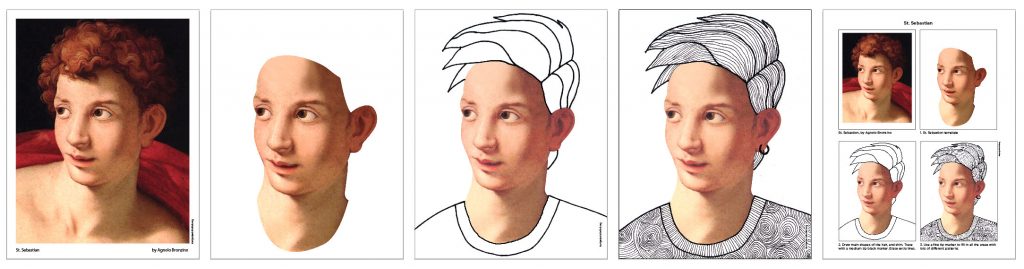
- Choose the picture that you want to make a line portrait.
- Cut out the shape of the face with neck.
- Glue it on the drawing paper toward to the bottom – you need space above the face to create your own hairstyle.
- Use a pencil lightly to sketch your design- this is SKETCH!
- Use a thick black marker to make outline of your design – go over two or three times to make outline thicker, if you have only one size of marker.
- Use a thin black marker to fill in your divided section with patterns – make it sure you must use different patterns in each section.
- YOU’RE DONE!
- Welcome to work on your portrait collage background – I encourage you to use different patters or colors to let your portrait stand out!
Week of May 18, 2020
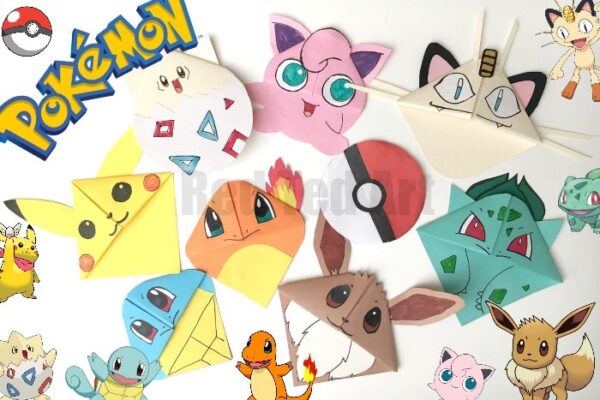
Origami bookmark

What you’ll need:
- Origami paper or printer paper
- Markers
- Scissors and glue
Let’s make your own bookmark of your favorite characters!

- Place the paper on the table so it resembles a rhombus.
- Bring the bottom corner of diamond shape to the top corner.
- Fold the square paper into half, from one corner to its opposite diagonal corner.
- After completing step 2, you’ll have a triangle shaped paper. Now, fold the bottom right corner of the triangle to its top corner. Fold the two flaps of the triangle up to the top corner.
- Similarly, fold the left corner to the top corner.
- Unfold the right and left folds.
- Fold down the top corner of the front layer paper to the bottom corner. This will create a pocket between the 2 layers of paper.
- Fold up the previous folds made in step 3. Fold half of it inside the pocket.
- Similarly, fold up and fold in the other side. The corner bookmark is ready!
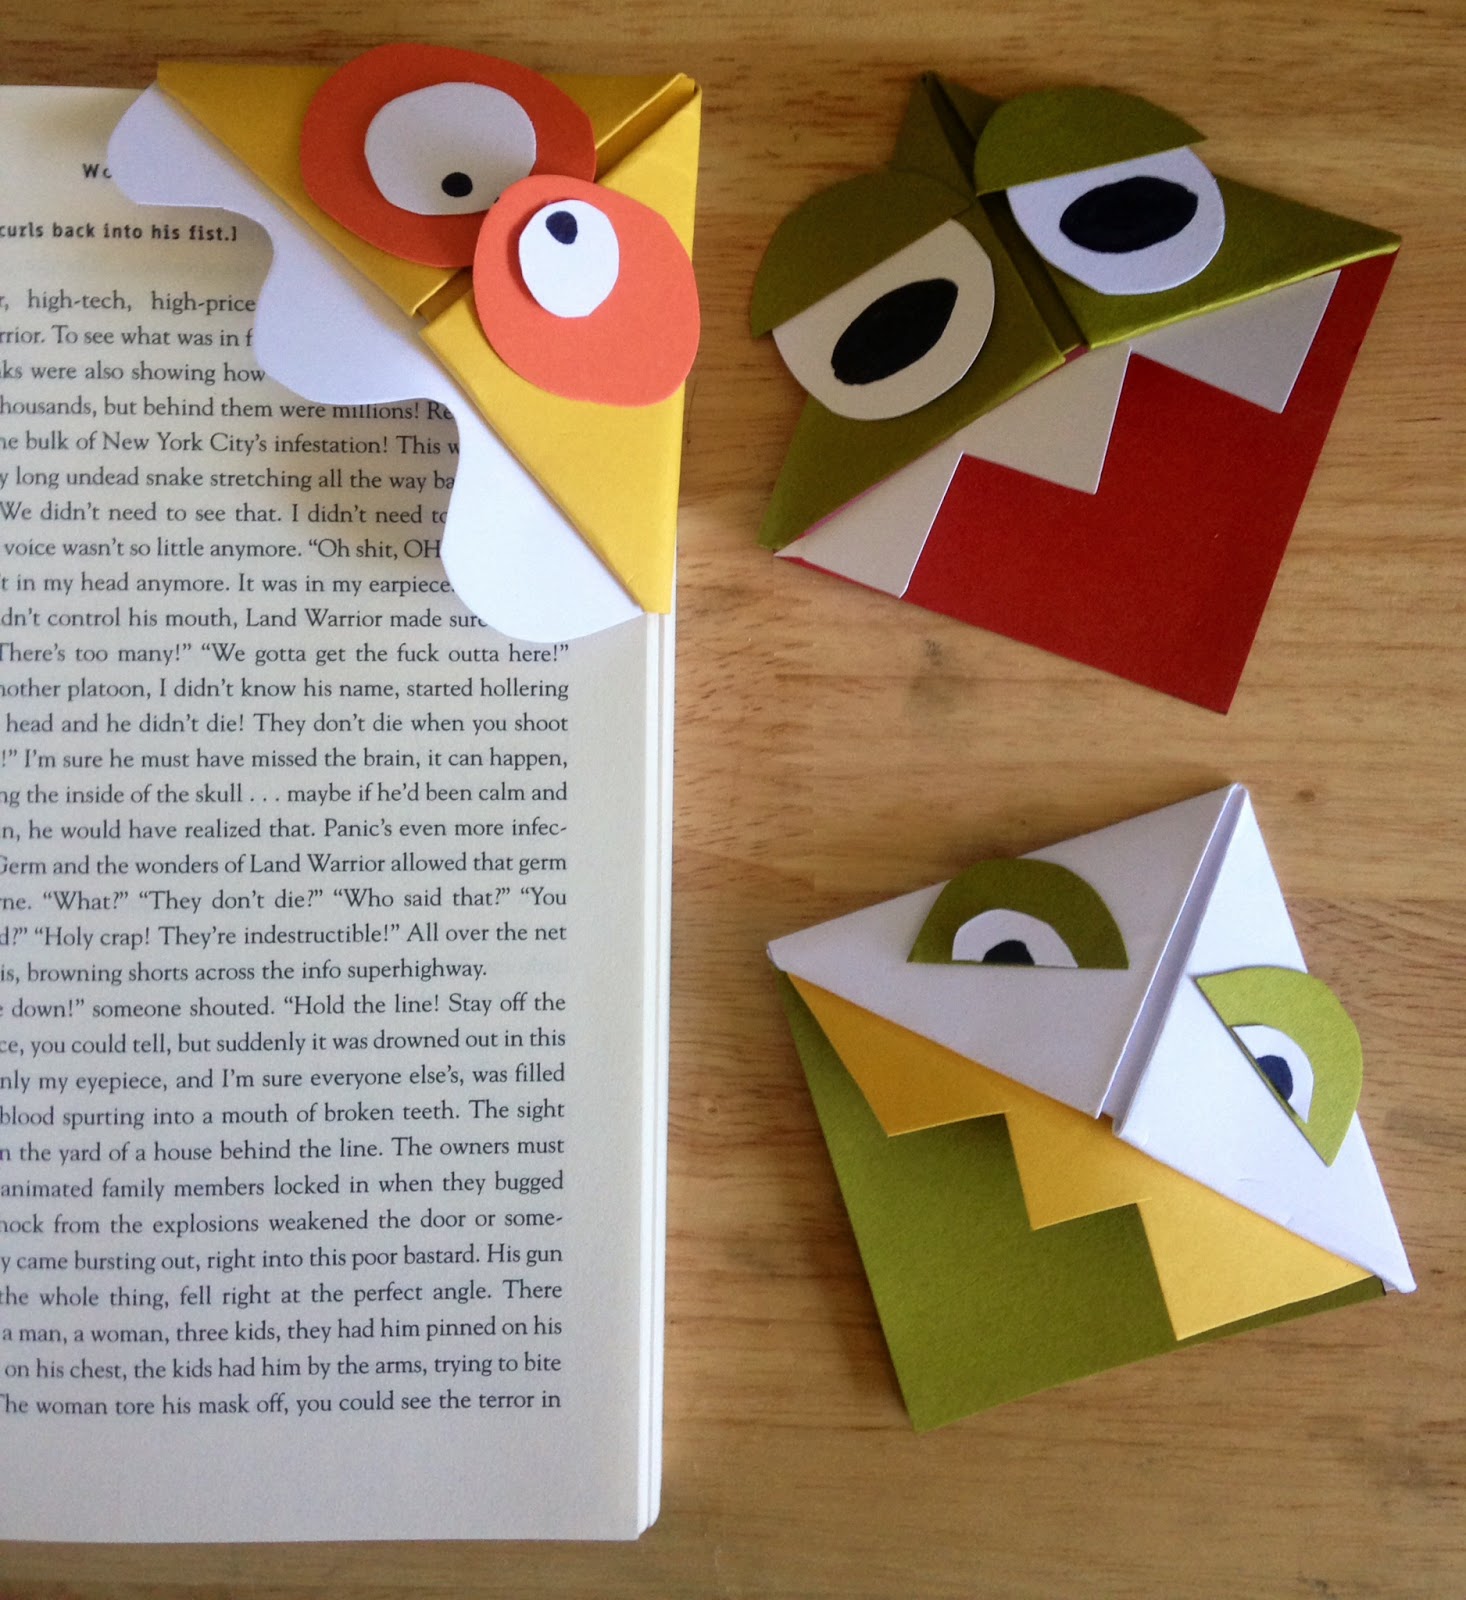
9. Simply, draw your own character’s details or glue cut outs for the character’s details. You can cut out or color a tongue, ears or nose for example. Allow the glue to dry. You’re all done! Happy reading!
source:www.busymommymedia.com
Week of May 11, 2020
TRADITIONAL MEXICAN PAPEL PICADO
Papel Picado is a traditional Mexican craft that features colorful paper sheets with intricate cut-out details. It was made by stacking many sheets of paper and using chisels to cut the designs. You can easily make your own Papel Picado by layering sheets of tissue paper and using scissors.

WHAT YOU’LL NEED:
• Colored tissue paper (12 x 9 approximately) / any thin colored paper
• Scissors • Marker
• Yarn and Tape to display Papel Picados


1. Fold a piece of tissue paper (lengthwise) in half and then in half again. Make sure one side consist only of folds.
2. Fold the long folded sheet in half. Mark a dot in the corner that is made up of folds. This helps the children recognize where not to cut.
3. Just like cutting a snowflake, cut shapes along all four sides avoiding the area with the dot.
4. To cut a shape from the middle of the rectangle, fold the paper in half again, and cut a shape into the fold. 5. Unfold carefully and tape tissue paper to a long string of yarn
To make multiple panels from one cut, layer 2-3 sheets of tissue paper together add tape (carefully) while cutting.

Source: https://www.deepspacesparkle.com/
Week of May 4th, 2020
Crystal cards for mom!
This project includes your library project: the mother’s day poems you all wrote!
Let’s make fun crystals with watercolor to make mother’s day perfect!
What you will need:
-thick watercolor paper (white ordinary paper works as well)
-black sharpie or oil pastel
-watercolor paints
-paintbrush
-salt (if you want to make it sparkle!)
Let’s begin!

- Draw 3 pointy angles below the middle of the paper.
- Following the red lines, make triangles out of the angles you made. Add 3 more angles near the top of the card.
- Follow the red lines again, and repeat for the top angles.
- Now, draw several straight lines that go down from each corner of the triangles you made.
- Repeat for the top crystals too.
- Now, let’s get ready to paint!
Let’s paint!

- Outline your crystals with a sharpie or an oil pastel. Take clean water, and use your brush to cover ONE crystal only.
- Now, take a color of your choice and tap the wet crystal. Watch the colors disperse!
- Now, take another color and tap the wet crystal again. Each crystal can have 2-3 colors.
- Repeat for another crystal.
- Now, tap the wet crystal with a color you want again. Like above, you can tap twice.
- Take another color and finish the crystal.
- Repeat for the rest of the crystals.
- Wait for the card to dry.

If you want another cool look, take another piece of paper and draw crystals on it. This will be a background, so don’t color on it. Cut out the colored crystals you made, and make a wad of tape. Stick the tape near the bottom of the background crystals, and place your colored ones on top. This makes it stand out!

Now, make sure to write your poem on the other side of the card. Present your finished art to your mother to make it a perfect mother’s day!
Week of April 27th
Bug Collage!
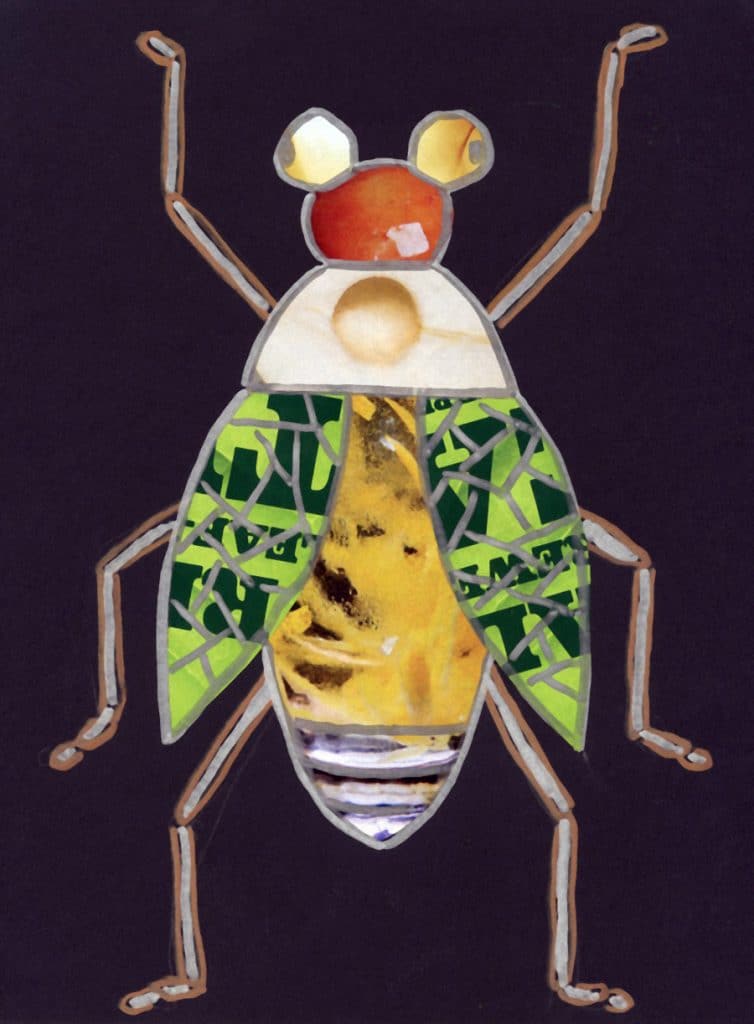
Let’s make a shiny and colorful bug with old magazines! Students can create a whole new look by using bold color pieces from magazines as bug parts.
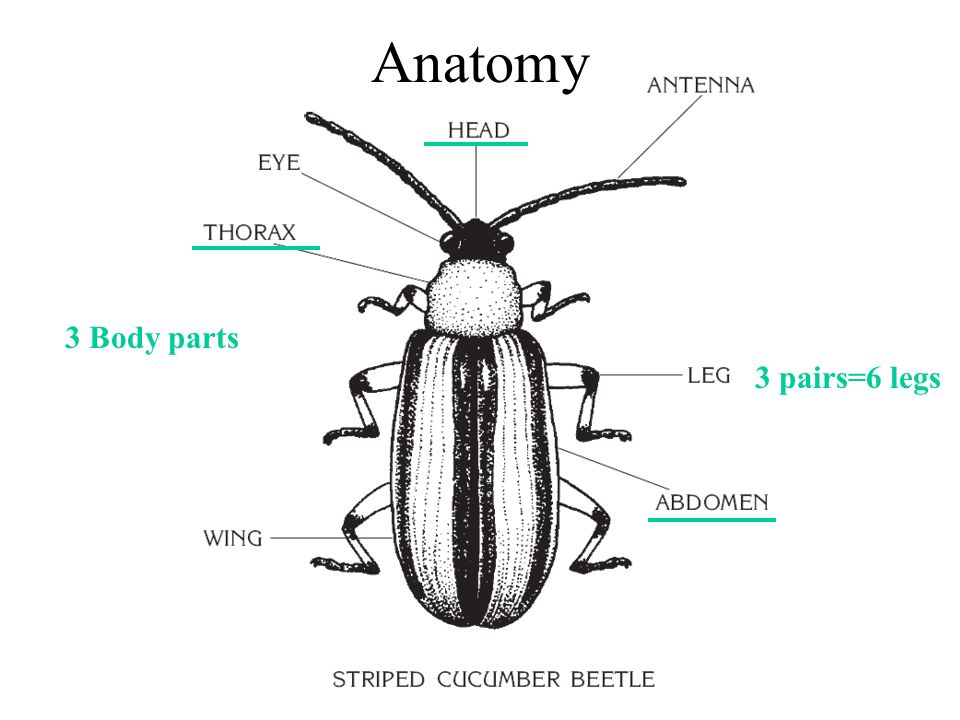
Students can even mix in science to this project by referring to the body parts as the head, thorax and abdomen.

What you need:
- • Black or any colored paper (for background)
• Old magazines
• Scissors
• Glue stick and Metallic marker ( you can use a white pencil instead)
Draw, Cut and Paste!
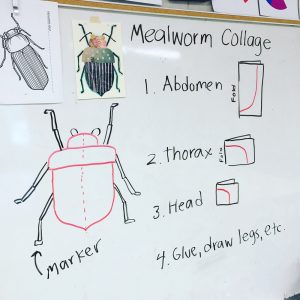
- Students can start by finding an image they want for their abdomen. Cut a square that they want to be the right size for the bug. Fold it in half, and cut out an acorn shape at the bottom . Glue it to the paper. TAKE A LOOK AT THE IMAGE ABOVE!
- Repeat this process, and find images they want for their wings, thorax, and head. Glue them to the paper. Keep the shapes simple!
- The legs and eyes are drawn in with a metallic marker/white pen(cil). Note that they are not just one straight line, but that they appear to have “elbows” and “toes” too.
- More white lines may be added on top of the magazine shapes for so extra fun.
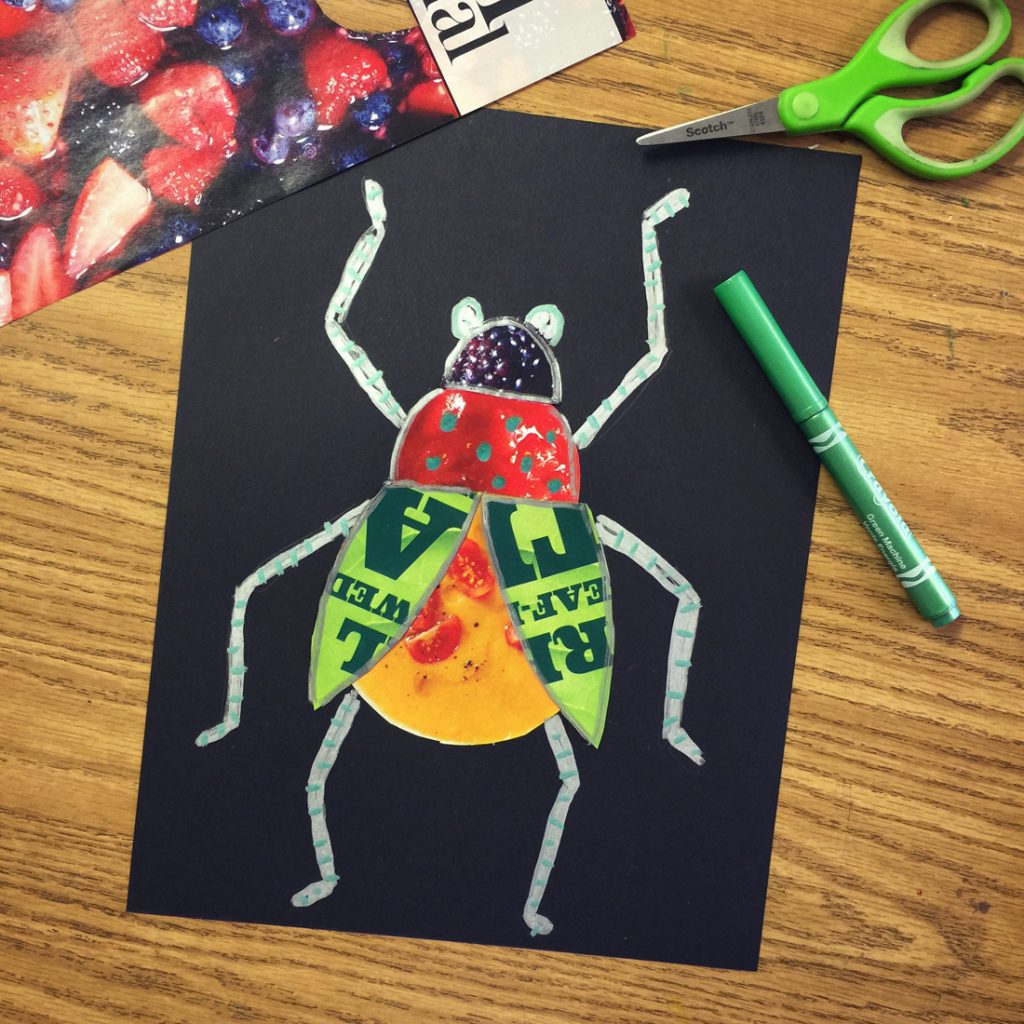
Tada! You’re all done!
If you want to have more fun, try drawing a habitat for the bug using your white pen(cil) or markers.
source: https://artprojectsforkids.org
Week of April 20th
Observational Drawing :
Contour line shoe drawing

What you’ll need :
- white sketch paper
- pencil
- black sharpie/ black pen
Draw, Outline, and Add
- Place a shoe that you like to draw.
- Observe the lines, shapes and contours of the shoe.
- Concentrate and draw all of the lines you see on the shoe. Please, draw a shoe to fit in the paper. Not too small and not too big! Don’t forget the little details, such as shoelaces, the tongue and any patterns you see on the shoe.
- And last, this is the really fun part! Imagine that the shoe is a playground for miniature stick people. Add tiny people on your shoe doing all sorts of activities… such as skating, skiing, climbing, sliding or running.


source:http://www.artisbasic.com/
Week of March 30th
Into the Future!
What would the future look like? Students should try to imagine a city built in the future. Using the reference pictures below, students should use only lines to draw their own futuristic cityscape.


Futuristic city line drawing steps:

What materials do you need?
paper, colored markers, and a black marker/pen.
Students shouldn’t use pencils for this project, and are encouraged to use black markers or pens.
Sketch with a black marker
Anything can be made in the future. Maybe there’s ice cream robots, or flying cars, or floating buildings! Use your imagination!
Make sure the skyline fills the entire paper.

Adding details
Now, will your buildings have windows? Does it have spikes on top? Students should try to make each building as unique and extraordinary as possible.


Coloring!
Remember, this is a line drawing: all the lines should stand out. The background should be left white to make the buildings pop!

Please save this project in your art folder (it can be anything that you can collect your art in) to bring to school later. If you want to share your amazing art, please send an email to your teacher and Ms. Kay.
source: https://www.deepspacesparkle.com/futuristic-city-line-drawing-art-project/
Week of March 23rd
Grades 4-5
This week, students will be going on their own reptile adventure!
Watch and listen!
Joan Procter, Dragon Doctor- by Patricia Valdez
WHAT YOU’LL NEED:
- 12″ x 18″ white sulphite paper (students are welcome to use other sizes if such a size is unavailable)
- Pencil and Eraser
- tempera paint (students can also use dry mediums: oil pastel or markers instead).
- If painting, 1 medium tip round brush and 1 small tip round brush (for outlining)
- Black marker, crayon or oil pastel as optional outing supplies.
Choose, sketch, color!
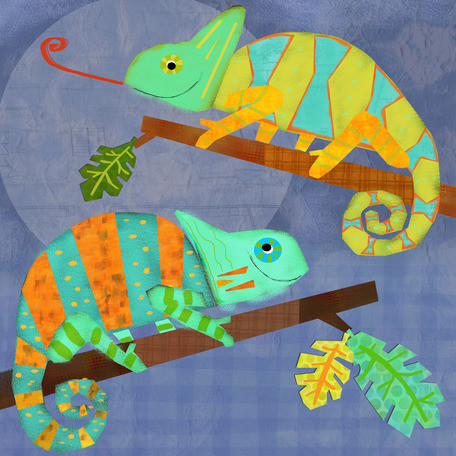
After watching the video, students will embark on their own adventure by choosing their own reptiles to draw! It could be a turtle, a snake, a crocodile, even a chameleon! Don’t forget their habitats, like a branch, a rock, even in the jungle… think about the position of the paper as well, for instance, a coiled snake would be vertical while a long crocodile would be horizontal.
Students should begin by lightly sketching the reptile they chose using a pencil; make sure the reptile stands out. Students should keep in mind what’s in the front, the middle, and the back. Is the reptile hiding behind a leaf? Maybe a rock?Then, the student should draw the leaf/rock in the front with the reptile behind it.
Students should begin to choose the colors they want to use. They can range from bright pink, dark green, maybe even a rainbow reptile!
Afterwards, students can use a black oil pastel to outline the reptile only. They can also use a black marker or crayon.
Key takeaways from this project are perspective and layers: students should be able to show which objects are in the front, the middle, and the back.
Here’s some fun finished examples!

